第一章-ElementUI
1初步认识
官网地址:https://element.eleme.cn/#/zh-CN/component/installation
2.13版本:https://element.eleme.cn/#/zh-CN/component/button
创建项目环境
用vue init webpack 项目名helloVue,然后安装依赖,vue-router、element-ui、sass-loader、node-sass
 1
 2
 3
 4
 5
 6
 7
 8
 9
10
11
12
13
14
15
16
17
|
#进入工程目录
cd hello-vue

#安装vue- router
npm install vue-router --save-dev

#安装element- ui
npm i element-ui -S

#安装依赖
npm install

#安装SASS加载器
cnpm install sass-loader node-sass --save-dev

#启动测试
npm run dev
|
环境
static目录存放静态资源,在src下新建一个components和router、view文件夹,components(功能的组件)和view(偏向视图的组件)都是组件。
引入完整的 Element(main.js)
 1
 2
 3
 4
 5
 6
 7
 8
 9
10
11
12
13
14
15
16
17
18
19
20
21
22
23
24
25
26
27
28
|
// The Vue build version to load with the `import` command
// (runtime-only or standalone) has been set in webpack.base.conf with an alias.
import Vue from 'vue'
import App from './App'

//导入elementUi
import ElementUI from 'element-ui';
import 'element-ui/lib/theme-chalk/index.css';


//导入路由
import router from './router'

//使用路由和 Ui
Vue.use(router);
Vue.use(ElementUI);

Vue.config.productionTip = false

/* eslint-disable no-new */
new Vue({
  el: '#app',
  //配置路由
  router,
  //element文档这样写的,下面也可以 render: h =>h(App)
  components: { App },
  template: '<App/>'
})
|
页面使用
1首先我们在view创建视图组件,从网站复制下来后,为其加上template标签。
2若是使用路由的话,那么在router/index.js下进行注册
 1
 2
 3
 4
 5
 6
 7
 8
 9
10
11
12
13
14
15
16
17
18
19
20
|
import Vue from 'vue'
import VueRouter from 'vue-router'

//导入自己写的组件
import HelloWorld from "../view/HelloWorld";

//安装路由
Vue.use(VueRouter);

//配置 导出路由
export  default new VueRouter({
  routes:[
    {
      //路由路径
      path:'/Login',
      //跳转的组件
      component:Login
    }
  ]
});
|
3使用路由跳转即可
1
2
3
|
//app.vue
<router-link to="/login">Login</router-link>
<router-view></router-view>
|
第二章-各模块使用
1布局
2表单
下拉框
时间框及处理
后台需要特定类型,可以进行设置。
<el-data-picker> value-format='yyyy-mm-dd'
3弹出框
3.1模态框,对话框
适用于本页面的修改,添加等。
组成:1触发开关的按钮,2模态框本身,3提交操作等。
  1
  2
  3
  4
  5
  6
  7
  8
  9
 10
 11
 12
 13
 14
 15
 16
 17
 18
 19
 20
 21
 22
 23
 24
 25
 26
 27
 28
 29
 30
 31
 32
 33
 34
 35
 36
 37
 38
 39
 40
 41
 42
 43
 44
 45
 46
 47
 48
 49
 50
 51
 52
 53
 54
 55
 56
 57
 58
 59
 60
 61
 62
 63
 64
 65
 66
 67
 68
 69
 70
 71
 72
 73
 74
 75
 76
 77
 78
 79
 80
 81
 82
 83
 84
 85
 86
 87
 88
 89
 90
 91
 92
 93
 94
 95
 96
 97
 98
 99
100
101
102
103
104
105
106
107
108
109
110
111
112
113
114
115
116
117
118
119
120
121
122
123
124
125
126
127
|
<template>
<div class="app-container">
  <el-table :data="list" highlight-current-row >
      <el-table-column align="center" label="序列" >
        <template slot-scope="scope">
          {{ scope.$index }}
        </template>
      </el-table-column>

      <el-table-column label="id" align="center">
        <template slot-scope="scope">
          {{ scope.row.id }}
        </template>
      </el-table-column>
  <el-button type="primary" size="mini" @click="handleUpdate(row)">
    执行模态框1
  </el-button>
	</el-table>

<el-dialog :title="textMap[dialogStatus]" :visible.sync="dialogFormVisible"
            :close-on-click-modal="false" //取消点击关闭模态框
               v-loading="updateFormLoading" //给出加载动画 绑定updateFormLoading
               element-loading-text="拼命加载中"
               element-loading-spinner="el-icon-loading"
               element-loading-background="rgba(0, 0, 0, 0.8)">
      <el-form ref="dataForm" :rules="rules" :model="commodity" label-position="left" label-width="70px" style="width: 400px; margin-left:50px;">
        <el-form-item label="id" prop="id">
           <el-input v-model="commodity.id" class="filter-item" disabled></el-input>
        </el-form-item>
        <el-form-item label="价格" prop="price" >
          <el-input-number v-model="commodity.price" :precision="2" :step="0.01" :max="9999999999.99"></el-input-number>
        </el-form-item>

      </el-form>
      <div slot="footer" class="dialog-footer">
        <el-button @click="dialogFormVisible = false">
          Cancel
        </el-button>
        <el-button type="primary" @click="dialogStatus==='create'?createcommodity():updatecommodity()">
          Confirm
        </el-button>
      </div>
</el-dialog>
  </div>
</template>
<script>
  import qs from 'qs';
export default {

  data() {
    return {
      list: [{"id":1,"cid":2,"cname":"打火机1","price":4},{"id":2,"cid":1,"cname":"测试","price":null},{isDecimal}],
      listLoading: false,
      updateFormLoading:false,
      dialogFormVisible: false,
      commodity: {
        id: undefined,
        price: 0
      },
      dialogStatus: '',
      textMap: {
        update: 'Edit',
        create: 'Create'
      }
    }
  },
  created() {
      this.fetchData();
  },
  methods: {
    fetchData(){
      this.axios.get(this.$storeUrl+"/commodity/showCommodity").then(response=>{
        this.list=response.data.commoditys;
      });
    },
    handleUpdate(row) {
      //到此处执行第二步2
      this.commodity = Object.assign({}, row) ;// copy obj
       this.dialogStatus = 'update';//表示模态框为修改,可以不要
      this.dialogFormVisible = true;//显示模态框
      this.$nextTick(() => {
        //等dom加载完毕,执行清除数据的方法
        this.$refs['dataForm'].clearValidate()
      });
    },
    updatecommodity(){
      this.updateFormLoading=true;
      this.axios({
        method:'post',
        url:this.$storeUrl+"/commodity/updateCommodity",
        transformRequest:[function(data) {
          return qs.stringify(data);
        }],
        data:{
        id:this.commodity.id,
        cid:this.commodity.cid,
        cname:this.commodity.cname,
        price:this.commodity.price
        }
      })
        .then(response =>
        {
          console.log(response.data);
          this.updateFormLoading=false;
          this.$message({
            showClose: true,
            message: '恭喜你,修改成功',
            type: 'success',
            duration:5000,
            center: true
          });
          this.dialogFormVisible = false
        })
        .catch(function (error) {
          this.updateFormLoading=false;
          this.$message({
            showClose: true,
            message: '无法修改',
            type: 'warning',
            duration:5000
          });
          console.log("出错了怎么?"+error);
        });
    }
  }
}
</script>
|
4表单校验
https://element.eleme.cn/#/zh-CN/component/form
基本用法
1为表单加:rules="loginRules"属性
2在data中的loginRules进行校验,也可以自定义校验,在里面写axios进行登录校验
3还可以进行手动触发校验this.$refs.loginForm.validate
4重置表单内容,清空原有错误this.$refs.loginForm.resetFields()
 1
 2
 3
 4
 5
 6
 7
 8
 9
10
11
12
13
14
15
16
17
18
19
20
21
22
23
24
25
26
27
28
29
30
31
32
33
34
35
36
37
38
39
40
41
42
43
44
|
<template>
<el-form ref="loginForm"
          :model="loginForm"
          :rules="loginRules"
          class="login-form" auto-complete="on" label-position="left">
</el-form>
</template>
<script>
  export default {
  name: 'Login',
  data() {
    const validateUsername = (rule, value, callback) => {
      if (!validUsername(value)) {
        callback(new Error('Please enter the correct user name'))
      } else {
        callback()
      }
    }
    const validatePassword = (rule, value, callback) => {
      if (value.length < 6) {
        callback(new Error('The password can not be less than 6 digits'))
      } else {
        callback()
      }
    }
 return {
      loginRules: {
        username: [{ required: true, trigger: 'blur', validator: validateUsername }],
        password: [{ required: true, trigger: 'blur', validator: validatePassword }]
      }
 },
   methods:{
     //手动校验
      this.$refs.loginForm.validate(valid => {
        if (valid) {
          this.$message.success("登录成功")
        } else {
          console.log('error submit!!')
          return false
        }
      })
   }
}
</script>
|
5导航栏
导航栏进行路由设置
<el-menu router> 设置router然后再el-menu-item index="/emp"的Index就可以直接写地址了
第三章-admin模版
1elementUI-admin
网址:https://panjiachen.github.io/vue-element-admin-site/zh/guide/advanced/theme.html
国内网址:https://panjiachen.gitee.io/vue-element-admin-site/zh/guide/#%E5%8A%9F%E8%83%BD
用Git把集成方案和基础模版clone下来,使用基础模版进行开发,需要什么功能时再从集成方案进行拷贝。
 1
 2
 3
 4
 5
 6
 7
 8
 9
10
11
12
13
14
|
# 克隆项目
git clone https://github.com/PanJiaChen/vue-element-admin.git

# 进入项目目录
cd vue-element-admin

# 安装依赖
npm install

# 建议不要用 cnpm 安装 会有各种诡异的bug 可以通过如下操作解决 npm 下载速度慢的问题
npm install --registry=https://registry.npm.taobao.org

# 本地开发 启动项目
npm run dev
|
1基础结构
在使用Idea开发vue-admin时,会自动开启setting中的ESLint,代码质量检测,必须用单引号,等等,可以将其关闭。
有时拷贝的数据为英文:改变只需在src/main.js修改其中的Vue.use(ElementUI)就好了
侧边栏主要基于 element-ui 的 el-menu 改造。
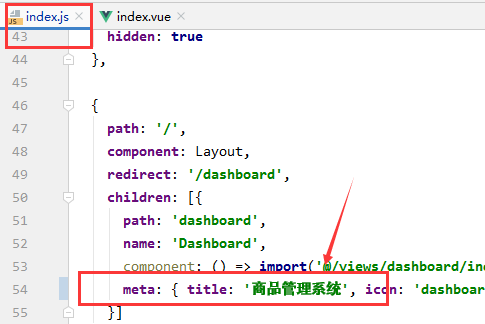
可以调整router中的内容来改变侧边栏的内容。
2分页插件
在示例网址https://panjiachen.gitee.io/vue-element-admin/#/table/complex-table
看到页面分页,然后去src/Views/table/complex-table找到这个文件

然后进行复制看到需要导入Pagination,使用的是template基础模版,所以需要导入src/components/Pagination,然后发现Pagination依赖src/utils/scroll-to。
1共导入两个文件
2使用还需要本地注册 export default {components:{Pagination}}
 1
 2
 3
 4
 5
 6
 7
 8
 9
10
11
12
13
14
15
16
17
18
19
20
21
22
23
24
25
26
27
28
29
30
31
32
33
34
35
36
|
 <pagination v-show="total>0"
             :total="total" //记录总数
             :page.sync="listQuery.page"//当前第几页
             :limit.sync="listQuery.limit"//每页数量
             @pagination="getList" //当前页所有记录
             />
<script>
import Pagination from '@/components/Pagination'
   export default {
components:{Pagination},
  data(){
     //分页
        total:0,
        listQuery: {
          page: 1,//当前页数   支持 .sync 修饰符
          limit: 5,//每页显示条目个数,支持 .sync 修饰符
          sort: '+id'
        }
  }//data结束
  ,methods:{
     //获取数据  插件mybatis使用的pagehepler
      getList() {
        this.axios.get(this.$storeUrl+"/commodity/pageCommodity",{
          params:{
            pageNum:this.listQuery.page,
            pageSize:this.listQuery.limit
          }
        }).then(response =>{
          this.list= response.data.list;//数据
          this.listQuery.page=response.data.pageNum;//当前页
          this.total=response.data.total;//总条数
          this.listQuery.limit=response.data.pageSize;//每页大小
        });
  }
 }
</script>
|
常见问题
| queries |
answer |
| 图标引用问题 |
网站找到图标后,下载svg然后放到目录@/icons/svg |
| 发布找不到js |
vue.config.js下设置publicPath为’./’ |
|
|